If you’re fed up with the hassles of maintaining and sharing physical documents, store them virtually in a Digital Locker, or DigiLocker. Here’s everything you must know regarding how to create a DigiLocker account.
Launched in 2015 by our Honorable Prime Minister, DigiLocker is an initiative by the Government of India (GOI) to minimize the usage of physical documents and encourage sharing of e-documents across various departments.
The platform, with a total of 106.98 million registered users, ensures the allocation and authentication of certificates & documents in a digital manner.
The main purpose behind the introduction of digital lockers for its people is to let people safely store and share their valuable documents such as driving licence, PAN card, Voter ID, policy documents, etc.
If you haven’t signed up for your DigiLocker account yet, here’s your entire guide to opening one, today. Let’s first start with a deep insight into a DigiLocker account.
DigiLocker – A Quick Overview
DigiLocker is an online service by The Ministry of Electronics & Information Technology (MeitY) under the Digital India Corporation (DIC). This online service for Indian citizens provides a reserved cloud storage space that is linked to each citizen’s Aadhar number.
These lockers let you store e-documents such as your PAN card, driving licenses, Voter ID, and policy documents securely. You also get the Uniform Resource Identifier (URI) link provided by the various issuer departments.
What Are The Benefits Of Using A DigiLocker Account?
A digital locker aims to promote the concept of paperless government and provide you with the following benefits.
- Access your important document from anywhere and anytime.
- No need to carry any physical documents for any sort of verification.
- Electronically sign your documents using the eSign facility to make self-attestation easier.
- For companies that offer online verification, DigiLocker will make the processing period faster.
- DigiLockers keep your certificates and e-documents very safe as they are secured by a 4-digit Personal Identification Number (PIN) to stop unauthorized access.
And, when you want to sign in to your account, you will have to enter the OTP sent to the phone number, as your account directly connects to your Aadhaar card.
How to Create A DigiLocker Account? A Step-By-Step Guide
You can create a DigiLocker account online by following the 4 simple mentioned below.
Step 1: Visit The Official Website Of DigiLocker Or Download Their Application
You can either visit the DigiLocker website at digiLocker.gov.in or download the application on your mobile phone from your Play Store/App Store.
Now, you will have to create your digital locker account by using your Aadhaar number. While creating your account, make sure that your existing phone number is linked with your Aadhaar number.
Step 2: Sign-Up On DigiLocker
Click on the Sign-Up button by entering your:
- Full name,
- Date Of Birth (DOB),
- Mobile number (linked with Aadhaar),
- Create a security PIN, and
- Email ID.
Step 3: Secure Your DigiLocker account by OTP Or Fingerprint
When you enter your 12-digit Aadhaar number, you will get two options. You can use any one of the below-mentioned options to proceed further.
- One Time Password (OTP)
- Fingerprint
Step 4: Create Your Username & Password
Once you have completed the above-mentioned process, the application will ask you to create a username and password. Enter your preferred username and password and press the Sign-Up button.
After the account is created successfully, the application will display the Dashboard screen of the DigiLocker.
How To Sign In To Your DigiLocker Account?
You can sign in to your DigiLocker account by going to the official website digilocker.gov.in and clicking the Sign In option given at the left top of the page.
Next, you can sign in by using any of the 2 available options:
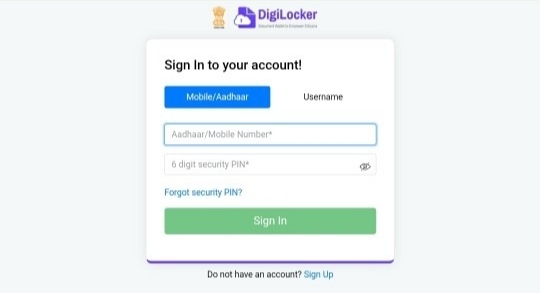
- Mobile/Aadhaar and your 6 digit security PIN
- Username and your 6 digit security PIN
You can select any one of the options. After you sign in to your account, you can upload and share your e-documents using your DigiLocker account only.
If you don’t know how to upload documents, here is a step-by-step guide you can follow.
How To Upload Your Documents To Your DigiLocker Account?
You can upload your certificates or e-document to your DigiLocker account by going to the My certificates section.
- First, you need to select the document type (SSC Certificate, Voter ID or PAN card, etc.) from the drop-down option.
- Once you have selected it, you will have to provide a name for it.
- Based on the document type you have selected, you have to fill in the necessary details that are relevant to the document.
- Upload the file from your computer or phone that needs to be uploaded to the Digi locker. The file uploaded should not be more than 1MB in size.
- You will have to describe the document that is being uploaded.
- Click on the Upload button.
How To Share The E-Documents On The Digital Locker?
- To share your certificates or e-document, you will have to click on the share link that is provided next to the document that you want to share.
- A pop-up box will appear. Enter the email address of the recipient in the pop-up box and click on the share button.
- The documents will be shared with the recipient through email. The receiver will get a mail from [email protected]. The subject of the mail will say the e-document name and type. The body will contain the URI link to the e-document and the sender’s name and Aadhaar number.
- The recipient will be able to access the e-document using the URI link given in the mail.
What Are The Key Components Of The DigiLocker?
Once you have logged into your account, you will get the view of the following sections mentioned below.
Dashboard
This is the homepage of your DigiLocker. You will be able to navigate to the other sections of your DigiLocker account from here. This page shows you the summary of all the documents that are issued to you and the link to get the e-documents from parties associated with DigiLocker.
Issued Documents
This section shows you the list of URIs (links) of digital certificates or e-documents issued by the Government departments or agents associated with DigiLocker.
Uploaded Documents
This section shows you all the documents that were uploaded by you. You can also update the document type and share your uploaded documents.
Shared Documents
This section shows the list of documents that you have shared with others.
Activity
This section logs all of your activities that were done by you while using Digi locker. The log comprises details about your activities such as file upload, download, share, etc.
Is A DigiLocker Safe To Use?
Yes, a DigiLocker is completely safe to use. The Ministry of Electronics and IT (MeitY) under Digital India Corporation has come up with the DigiLocker website and app service to offer its users a secured gateway for the exchange of documents.
You can also check your activity that was done on the website or the app so that you can immediately stop any fraudulent activities. You will also receive an OTP on your registered mobile number every time you log in so that you can know if someone else has tried to access your account.
Frequently Asked Questions about DigiLocker (FAQs)
Ans: You can sign up for DigiLocker by using your mobile phone number or unique 12-digit Aadhaar card number. By sending an OTP (one-time-password), your mobile phone number and your Aadhaar card number will get authenticated. You will have to set up a security PIN for 2-Factor verification. After which your DigiLocker account will become active.
Ans: The benefits of using a DigiLocker are:Quick access to your certificates and e-documents at any time!
1. In terms of validity, these documents are valued at par with the originals.
2. Digital exchange of documents with your consent.
3. Faster delivery of documents to various government departments for authentication.
Ans: You can upload your documents onto the DigiLocker account by clicking on the Uploaded Documents section.
1. Click on the upload icon to start uploading a document.
2. In the pop-up dialog box, select the document from your computer and select ‘open’ to finish the uploading of your document.
3. You will also be able to edit the name of the document by using the edit icon which is next to the document name.
Conclusion
The DigiLocker is a very good initiative that is taken by the government of India to promote the digital infrastructure of our country. This would provide every citizen with a secured vault to store their documents, that can be accessed anytime.
The validity of these documents is equal to the originals and reduces the possibility of fake documents. DigiLocker is very user-friendly as even a less tech-savvy can use it. The exchange of documents is not only convenient but also very environmental-friendly and time-saving at the same time.
Here onwards, I believe that more organizations will follow this and register themselves on DigiLocker. But, as this service becomes more common, the Government of India has to take more precautions regarding safety, apart from the actions that are already carried out to protect these documents.
Hence, I hope this guide on how to create a DigiLocker account will help you in creating one for yourself.
You Might Also Like:


